The implementation of the LRGB technique in Astroart would allow you to capture the color information of an object from different sources: if you do not have a filter wheel but you wonder how would appear your image if colored, you can even avoid to grab the RGB frames and color your monochrome images with the splitted RGB channels frames coming from jpg images found (for example) on the WEB. I created this LAB because I was fascinated of the great skillness of Al Kelly in capturing true colors from deep sky objects: I grabbed some shots of M97 with a Starlight HX516 CCD camera at the Observatory of Cavezzo and tried to "paint" the resulting stacked image using the splitted RGB channels from Kelly's great image of M97 (see at http://www.ghg.net/akelly/m97wcmyl.jpg
). Don't forget to visit his web site, full of great images and documents to improve your CCD tecniques.
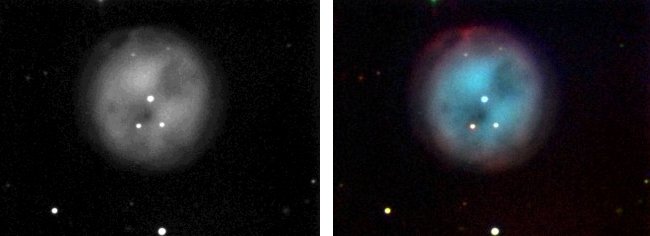
1. The LRGB Technique This technique is based on the fact that the human's eye is very insensitive to the resolution of the colored data then the resolution of a color image is determined by the resolution of the L (luminance) image only: and this is true either for deep sky object and for solar sistem object like planets. This principle can allow the CCD imager to concentrate his efforts in producing one good monochrome with high S/N ratio image without wasting time in taking long and full resolution R (red), G (green), and B (blue) frames. Filtered frames can infact be taken with a lower resolution (i.e with binning 2x2 or 3x3) and with shorter exposure times (up to 1/9 of the exposure time in full resolution for each filtered frame). Nevertheless, the LRGB and registering tools implemented in Astroart can help you to color your monochrome images even with single color images that come from third parties or that you can find or download as JPEG, BMP or TIFF (48 bit) from the WEB: and results are aestetically nice, like you can see in Fig. 1 below. How I did this? Follow the image processing steps described below.
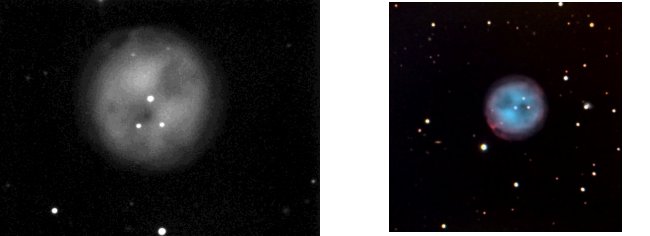
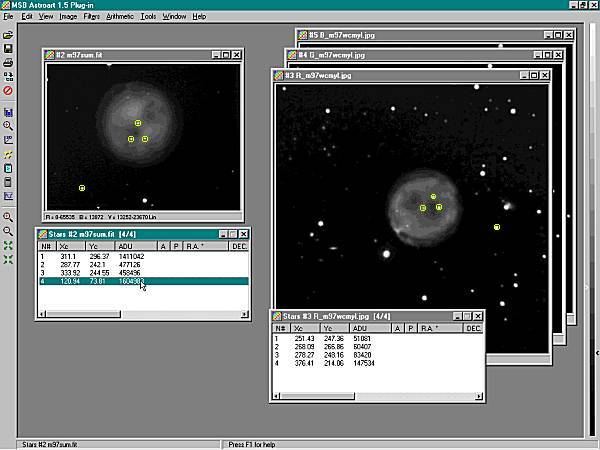
Fig. 1 - On the left the original greyscale image of M 97 taken at the Observatory of Cavezzo and on the right the same image colored with Astroart using the Al Kelly's jpeg image downloaded from the WEB. 2. Sub-pixel Registration Of the ImagesNow, you have found a wonderful and colored image of an object that you just captured the night before but ... with great disappointment (Fig. 2) the images have different scales and different field rotations ( a perfect match between two images from different observatories would be almost impossible ! ). Then the first step is to import the color image in Astroart and register its geometry with your monochrome image.
Fig. 2 - On the left greyscale image that we want to color and on the right the Al Kelly's jpeg image downloaded from the WEB. Both images were resampled to the 50% of the original for a better fitting and comparision in this page only.
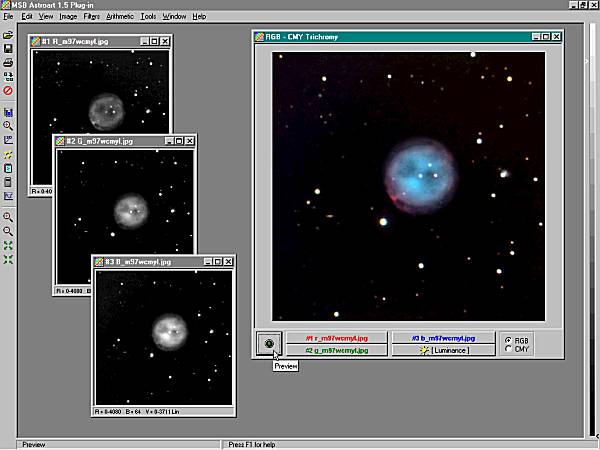
3. The Final Touch Now, if everything was well done, you shoud have on the desktop (and saved on your disk) the three channel-images "co-registered" with your grayscale image. Open the Trichromy window with Tools | Trichromy, LRGB, LCMY, select the respective channel-image using the colored buttons on the bottom of the window then select the Luminance image (your grayscale image) and click on the Preview button. After a while you should see the result of your work in the Trichromy window. Click on the image with the right mouse button: you can now save the result as a BMP or JPEG (compressed) 24 bit color image.
© 2000 M. Nicolini - All rights reserved |